Have you ever tried video lighting on a budget? If you’re a marketing professional, you’ve probably been tasked by someone on the senior leadership team to produce video content for your organization.  It was probably a brief testimonial video, or an in-house presentation to your peers.  You probably thought it looked pretty good, but every time you tried it, it just never came out quite as good as when you hired in the professional video team. Barring some technical blunder, 90% of the problem with video that isn’t quite up to par is lighting. Video lighting can be tricky. Video lighting on a budget can be a nightmare. Today, we’ll introduce you to a few simple concepts that will take your video lighting to the next level, regardless of your budget.

Video Lighting

Creating art with light and shadow is about discovering how much and from where the light is striking your subject.

First, here’s a simple factoid to keep in mind as we get started:  for photography or video, image capture is really light capture.  Imaging is simply making art out of light and shadow, and for subjects in front of a camera, it’s almost always a simple three-light setup.  With a practiced eye, you can easily notice the three light setup at work on anything from commercials to your favorite tv shows and movies.  The three light system involves a primary light called a “key”, a secondary light called a “fill”, and an accent light called a “rim.”  Let’s take a look at each of them and figure out how we can use them for video lighting on a budget.  

The Key Light

The first light in our three-light setup is the key light.  This light illuminates the brighter side of your subject’s face.  Which side you place your key light on (closer or further from the camera) is a matter of taste and application. Your key light can be large or small, soft or hard, artificial or natural.  Each of these things makes a difference to how your image looks, so you should always try out different things.

Window Lighting

Move the light in closer, and your shadows become softer.  Move it further away, and they become harder.  Place your light at 90 degrees from your subject for a moody, dramatic look.  Place your key light at 45 degrees for a more natural look.  When you want a flat, even look (good for older skin), place this light directly over the camera.

Experiment with your key light to see what you like best, and what fits your purpose.  Are you lighting for a happy, inspirational piece?  It’s probably not a great idea to get too dramatic.

The Fill Light

A fill light acts to illuminate the opposite side of your subject’s face, so it isn’t too deep in shadow. Your fill light should be the same color as your key light, but darker, adjusted to taste.  Keep in mind though, that your video project may not call for any “drama” at all, and you don’t want any mood or shadow going on.  In this case, your fill light could be an exact mirror of your key light.  Be careful with this though, as you’ll now have shadows going both directions, and this can look very awkward and jarring. The fill can be a similar light to the key, or a reflection of the key.  Reflectors can do a good job at this and they’re quite cost-effective.

The Rim Light

A rim is a light positioned behind the subject to illuminate the shoulder and the fringes of the hair in order to create the illusion of depth. It is not strictly necessary to use a rim light, but if the subject is blending in with your background, then a rim light can be used to separate the subject from the background. The rim light must be directly behind the subject, or just out of frame to either side. A spotlight, or, more inexpensively, a cell phone camera, can be used as a rim light.  Here’s a simple diagram:

If You Can Only Afford One Light

Video lighting on a budget certainly presents challenges, but also forces creativity. If you can only afford to buy one light, use it in a clever way.  Use it as your key light, by putting it on a stand and elevating to 45 degrees up and to one side. Use a filter to change the color.  You can also position a reflector, mirror, or white sheet so that the light that misses your subject bounces back toward them.  This becomes your fill light. You can use a cell phone light if you can find a way to position it out of frame, behind your subject.  

Using Natural Light Outdoors

Using the Sun As A Budget Light SourceIf you don’t want to (or can’t) spend any money on lighting equipment, you’ll need to use practical lamps or the sun to do your heavy lifting. This is totally doable, and can look fantastic, but you have to be careful of a few pitfalls.

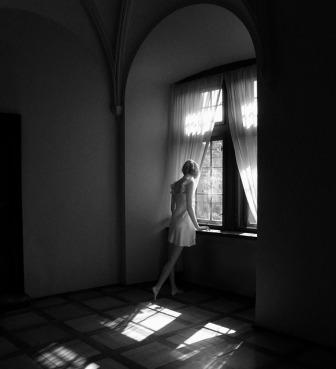
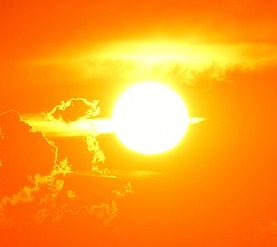
That flaming ball of fire in the sky?  Indeed, that’ll work, but it comes with challenges. One challenge is that the sun is actually quite a small source, and can produce very hard, sharp shadows during certain times of the day. This can be solved either by filming in the shade, or using a bed-sheet as a diffuser. Another challenge with using the sun is that it changes throughout the day. This can be a problem if you are cutting together many snippets of footage, as you’ll have a lot of inconsistency.  Here are some basic tips, if you need to use the sun:

  • shoot just as the sun is coming up, or going down, as the shadows will be more gentle
  • place a large sheet between your subject and the sun, to soften the shadows
  • film entirely in the shade

Using Natural Light Indoors

Indoor lighting can be more easily controlled, but it can be difficult to produce enough light to eliminate grain. The least expensive way to get enough light indoors is through a window, which will unfortunately introduce variability throughout the day. Once you find a suitable window, use a bedsheet or curtain on the window to act as a diffuser, reducing sharp shadows. Then place your subject 45 degrees from the window.  This will be your key light. Setup a towel or other white sheet to act as a fill, reflecting light back at the subject.  Be wary of under or over-exposing as the sun comes up or goes down.

Keep Experimenting with Video Lighting on a Budget!

The more you experiment with these practical suggestions for video lighting on a budget, the better you’ll get at it, and the better your video projects will look.  Once you practice with natural indoor and outdoor lighting, when you CAN afford to purchase a light or two, your job will get a little easier, but you’ll have established some great baselines to start from.

As always, if you have any additional questions, let us know!  We love to talk shot, and are glad to help.