 Next, you need to find out who your ideal target audience is (if you haven’t already).
Familiarizing yourself with your ideal viewer will guide your decisions all along the pre-production process so that your video will better resonate with their needs and wants.
Imagine the ideal person you would want to watch your video, and the action you want them to take; this could be a hypothetical employee, or the perfect client you would love to have. Write down some key characteristics about them.
1. What is their income level?
2. Are they self employed?
3. How much free time do they have?
4. Are they married?
5. Do they have children?
6. What are their interests and hobbies?
7. What are their values?
8. What problems are they facing?
9. What are their purchasing habits?
When writing about your ideal customer, remember: you are trying to market toward the clients you want, not the clients you already have. Video pre-production for success means you have a clear target, and you know when you hit it.
 Your script is the key to getting the perfect message across to your target audience. Your script will guide your messaging, whether that’s through text, voice over, or narration from a live actor.
Your script is the core of the message you want to send. It forms the backbone of your video, and the rest of your planning efforts will rely heavily on having a well written script. If you don’t take the time to perfect your script beforehand, you’ll need to go back and change it later, which can become expensive very quickly.
Once you start writing your script, you can treat it like any other writing project. Start with an outline of all the information you want to cover, then create a rough draft. Once you have a rough draft complete, narrow it down until you’ve made all your points clearly, and succinctly. Now ask someone to read it out loud to you, so you can hear how it sounds, and then make revisions as needed. Take as much time as you need to get the script perfect before moving on.
Pro Tip:
You should use a timer to see how long it takes to read out loud. If you want your video to be short, but it takes a long time to read, you’ll need to trim out more content until it fits into your time frame.
The next step of the video pre-production success formula is to craft a “storyboard.” Your storyboard is a visual representation of what each shot is going to look like and what parts of the script will accompany it.
Your storyboard should have a panel to show what each shot will look like, and a space for the part of your script that will accompany it. It should look something like this:
A detailed storyboard with pictures/drawings and script references will help you visualize the shots and communicate what you want to your camera operator. A storyboard is the most crucial component to saving on filming costs and needless re-shoots.
You can fill out the panels with drawings, photos, or screenshots that represent each shot you want to see. In a space next to the panel, add the part of the script that will accompany that scene. Don’t forget to add any special details or considerations for how you want to shot to look. By the end of it you should have your whole video planned out on the storyboard, looking something like a comic book. This will be an essential tool for when it comes time to film your shots.
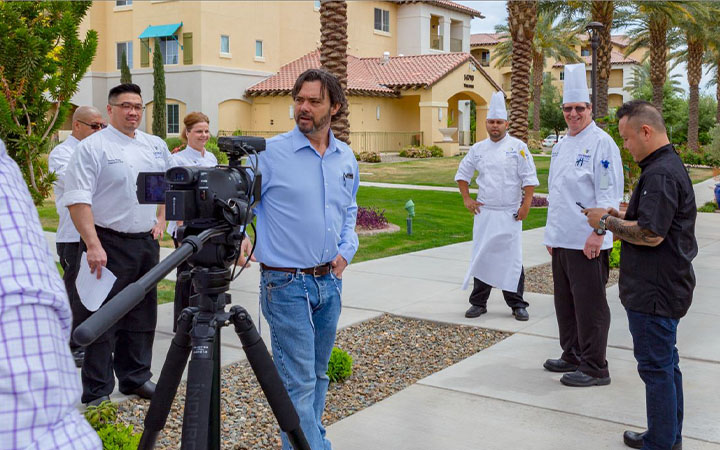
The shot list is your complete schedule for the day of filming. That’s when you and all your talent will get together and gather all the media you need.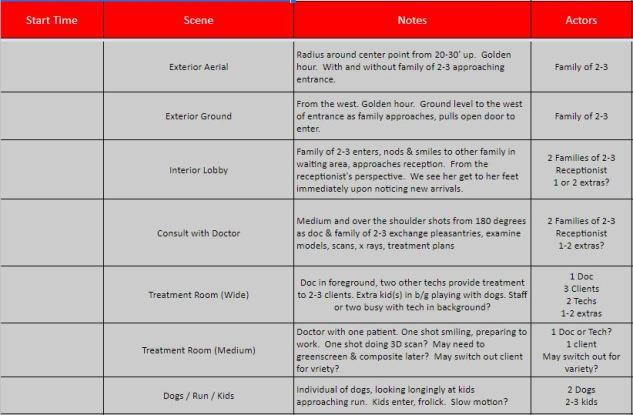
A completed shot list will work as a schedule for you and your talent. It will preventing miscommunication, and will keep everyone on the same page for the whole shoot.
Your shot list should include these categories:
1. The shot
2. The location where the shot takes place
3. The time of shooting
4. Necessary crew
5. Necessary actors
6. Detailed description of the shot
Run your shot list by anyone who needs to approve it. Once it’s O.K., send a copy to everyone involved, and send reminders ahead of time that the shoot is coming up!
